
sadp basics
How to Activate Hikvision NVR Step by Step
Activate a Hikvision NVR with SADP: find Inactive, set password & IP, browser login, live view, add cameras on a switch.
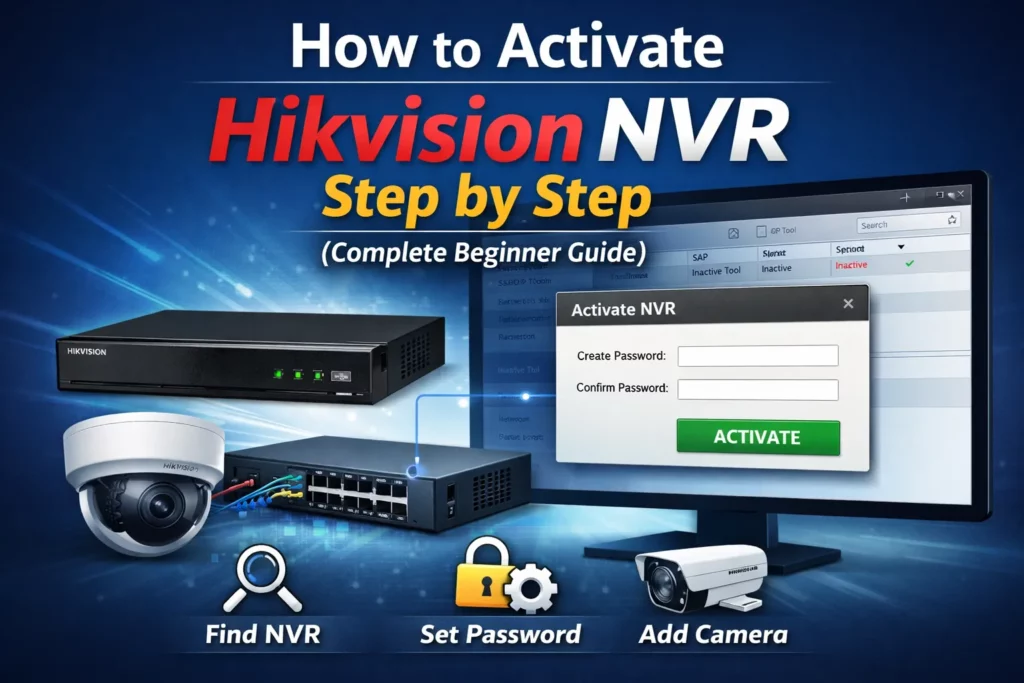
Activating a Hikvision NVR is simple if you follow the right steps. In this guide, you will learn how to activate a Hikvision NVR using a computer.
We will reset the NVR, activate it again, and then add a camera. This guide uses very simple words, short sentences, and clear steps—so even beginners can follow easily.
For a shorter overview of activation patterns, see activating Hikvision devices with SADP. To change IP after activation, use our change IP with SADP guide.
Table of contents
- What you need before starting
- Network setup used in this guide
- Step 1: Restore Hikvision NVR to factory default
- Step 2: Why the old IP address will not work
- Step 3: Find inactive NVR using SADP Tool
- Step 4: Activate Hikvision NVR in Sadptool
- Step 5: Change NVR IP address to match your network
- Step 6: Log in to Hikvision NVR from browser
- Step 7: Fix live view in modern browsers
- Step 8: Add camera to Hikvision NVR manually
- Step 9: Camera status shows offline?
- Step 10: Check live view
- Direct NVR camera vs network camera
- FAQs
- Conclusion
What you need before starting
Before you begin, make sure you have the following:
- A Hikvision NVR
- At least one Hikvision camera
- A network switch
- A computer or laptop
- Sadptool (SADP) installed on your computer
- All devices connected to the same network
This setup makes the process easier and faster.
Network setup used in this guide
Here is the basic setup:
- NVR connected to a switch
- Camera connected to the same switch
- Computer connected to the same switch
Because everything is on one network, communication works smoothly.
Step 1: Restore Hikvision NVR to factory default
First, we reset the NVR.
- Log in to the NVR menu
- Go to Configuration
- Click Maintenance
- Select Restore to Factory Default
- Choose Restore All Parameters
- Click Restore
Now wait. The NVR will reboot. It will also get a new IP address (or factory defaults, depending on model).
Step 2: Why the old IP address will not work
After reset:
- The old IP address is gone
- The browser cannot find the NVR
- This is normal behavior
So what do we do next? We use Sadptool (SADP).
Step 3: Find inactive NVR using SADP Tool
The SADP Tool helps you find Hikvision devices on the network.
- Open the SADP Tool
- Click Refresh
- Wait until the NVR appears
- Look at the Status column
You will see the NVR marked as Inactive. This means it needs activation.
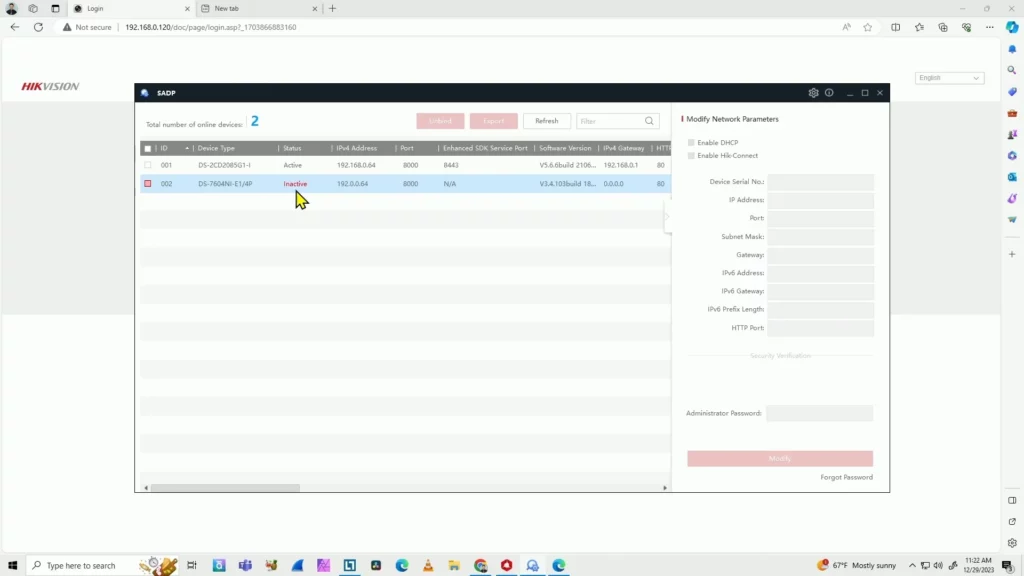
Inactive NVR visible in SADP after refresh—ready for activation.
Step 4: Activate Hikvision NVR in Sadptool
Now comes the main step.
- Select the inactive NVR
- Click Activate
- Create a strong password
- Re-enter the password
- Click Activate
Wait a few seconds. The NVR status should change to Active.
Set a strong admin password and confirm activation in SADP.
Step 5: Change NVR IP address to match your network
After activation:
- The NVR IP may not match your network
- This can cause access issues
- So you must change the IP
Steps:
- Select the NVR in SADP Tool
- Enter a new IP address
- Enter the correct gateway
- Type the NVR password
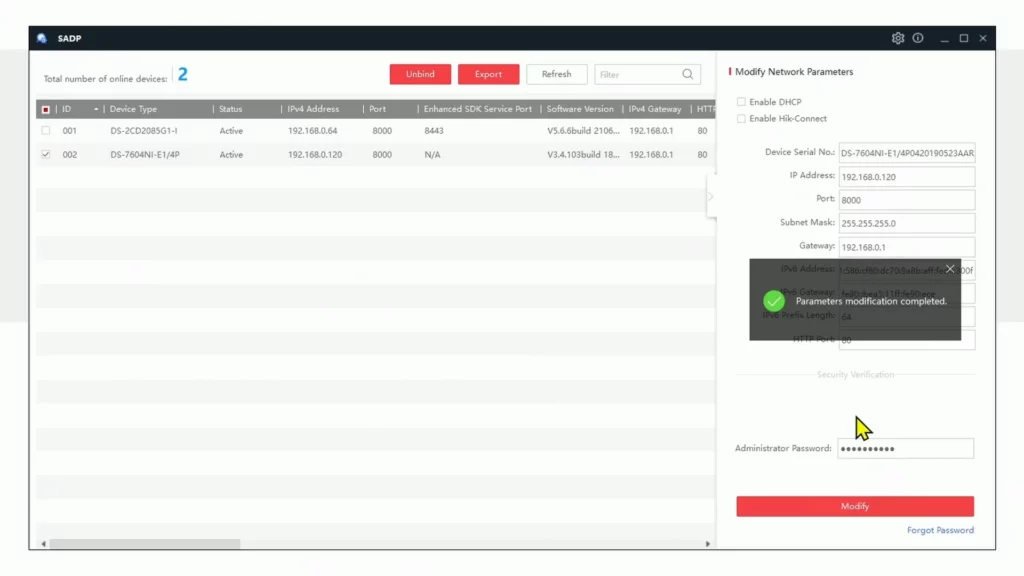
- Click Modify
You should see a success message. For more detail, see the change IP guide linked in the introduction above.
Match the NVR IP and gateway to your LAN, then save with Modify.
Step 6: Log in to Hikvision NVR from browser
Next, open your browser.
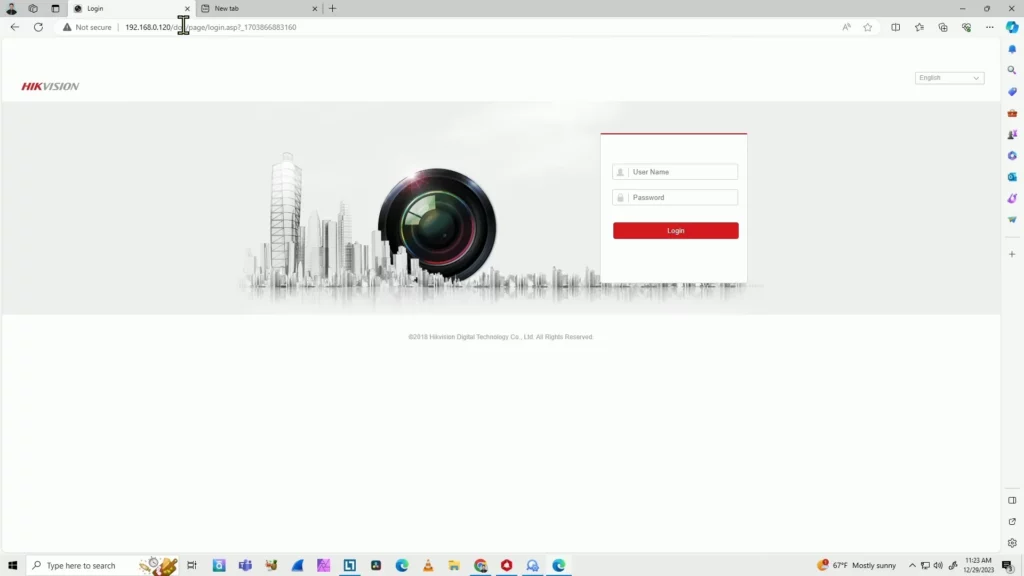
- Type the new IP address
- Press Enter
- Log in with your password
At first, you may see a plugin message. This is common on some firmware builds.
NVR web UI after browsing to the new IP—sign in with the password you set in SADP.
Step 7: Fix live view in modern browsers
If you use Edge or Chrome:
- Live view may not show
- A plugin message may appear
Easy fix (Edge):
- Open the browser menu
- Reload the page in Internet Explorer mode (where available)
- Log in again
Now live view often works. Exact options depend on your browser version; check Hikvision’s current documentation for your firmware.
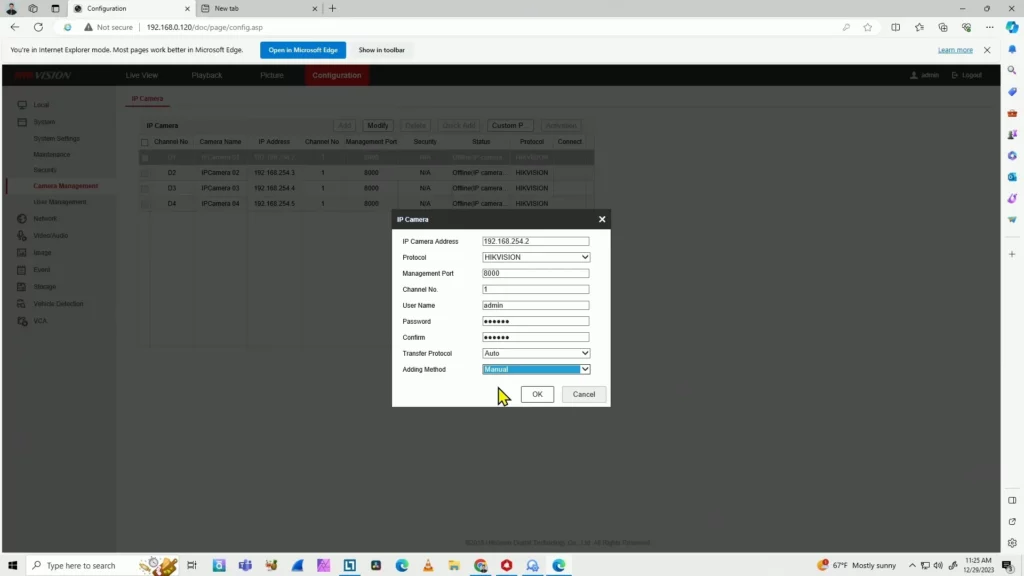
Step 8: Add camera to Hikvision NVR manually
Now let’s add the camera.
- Go to Configuration
- Open Camera Management
- Select a camera channel
- Click Modify
- Choose Manual mode
- Select protocol as Hikvision
- Enter the camera IP address
- Enter the camera password
- Click OK
Wait a few seconds.
Step 9: Camera status shows offline?
Sometimes you may see:
- Camera does not exist
- Camera looks offline
This is often normal. Try this:
- Go to Live View
- Then return to Camera Management
- Refresh the page
Now the camera will often show Online.
Step 10: Check live view
Finally:
- Open Live View
- Click on the camera
- Video should appear
This confirms everything is working correctly.
Direct NVR camera vs network camera
There are two ways to connect cameras:
Cameras connected directly to NVR
- Auto detected
- Plug and play
- No manual setup needed (for many kits)
Cameras connected via switch
- Manual setup required
- Same network needed
- Works well when planned
Both methods are supported.
FAQs
1. Why does my Hikvision NVR show inactive status?
This happens when the NVR is new or reset to factory default. Hikvision devices must be activated before use. You can activate it using the SADP Tool.
2. Can I activate a Hikvision NVR using a computer?
Yes. Using a computer is often the easiest method. You need the SADP Tool and a working LAN path to the NVR.
3. What should I do if I forget my Hikvision NVR password?
If you forget the password, you must use an official recovery path (often reset). After reset, the NVR may show Inactive again—then activate it with a new password. Read password reset, ethics, and support before attempting resets.
4. Why is my camera showing offline after adding it to the NVR?
This is common. Sometimes the page does not refresh correctly. Go to Live View, then return to Camera Management. The camera usually shows online after refresh.
5. Do I need manual setup if the camera is connected directly to the NVR?
No. Directly connected cameras are often detected automatically. Manual setup is more common when cameras are on the same network via a switch.
Conclusion
Now your Hikvision NVR can be activated and working: camera online, live view smooth. This method is simple and reliable. Follow these steps anytime you reset or install a new NVR. You are ready to add more cameras and start recording.
Confirm menus and downloads on official Hikvision materials for your model.
More on SADP Tool
More articles
- How to Activate a Hikvision IP Camera
Use SADP from HiTools on your LAN to find inactive Hikvision cameras, set an admin password, verify in a browser, then tune IP and security.
- Change camera & NVR IPs with SADP
Change Hikvision camera and NVR IPs with SADP: requirements, step-by-step Modify workflow, DHCP off, verification, common fixes, best practices, and FAQs.
- How to use the SADP tool (2026)
Use Hikvision SADP on your LAN: detect devices, activate, change IP, batch config, password workflows, troubleshooting, mistakes to avoid, and FAQs.
- Install SADP on Windows 10 (Hikvision)
Install Hikvision SADP on Windows 10: official download, Run as administrator, Npcap, firewall allowances, and fixes when SADP won’t detect devices.